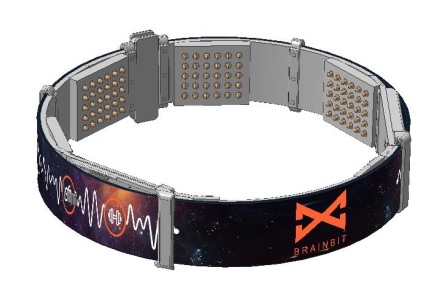
Brainbit User Manual
Contents
SAFETY PRECAUTIONS
The following precautions are necessary to avoid potential harm to the user or damage to the device.
![]() Do not use a damaged charger with a USB cable, or loose sockets.
Do not use a damaged charger with a USB cable, or loose sockets.
Avoid ‘cable kink’ and other damage to the USB cable while charging the battery.
While charging, the USB cable and battery block should not be touched with damp hands.
Do not use the device during thunderstorms, which increase the risk of electrical shock.
Do not place the device inside or on top of heating sources (such as microwaves, stovetops or radiators). When severely overheated the device may explode.
Do not expose the internal components of the device to moisture.
![]() Do not attempt modification or repair of the device. In case of malfunction, contact the manufacturer.
Do not attempt modification or repair of the device. In case of malfunction, contact the manufacturer.
Extreme heat and cold may damage the device, as well as reduce battery life and power output.
Product subject to WEEE regulations concerning separate waste collection.
The device should only be used on healthy, undamaged skin.
BATTERY INSTALLATION
![]() Follow the steps below to install the battery:
Follow the steps below to install the battery:
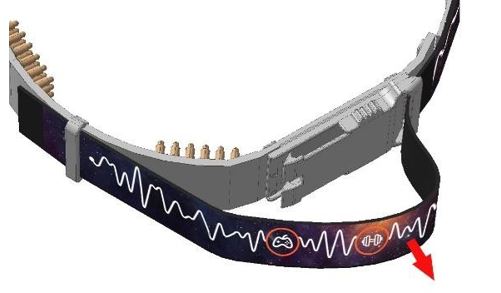
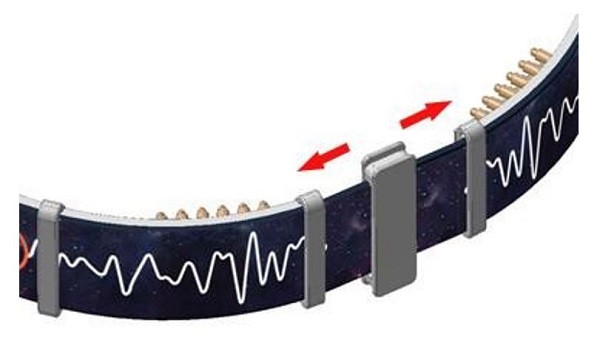
1. Extend the textile band;
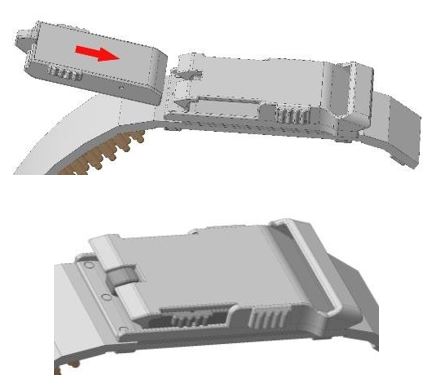
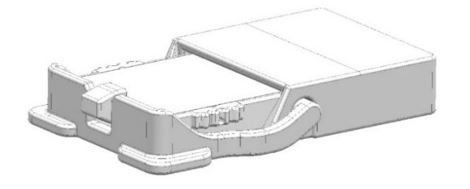
2. Insert the battery until it clicks, by interlocking battery projection with the cut- out section of the battery mount;
![]() The battery projection should interlock precisely with the cut-out section of the battery mount.
The battery projection should interlock precisely with the cut-out section of the battery mount.
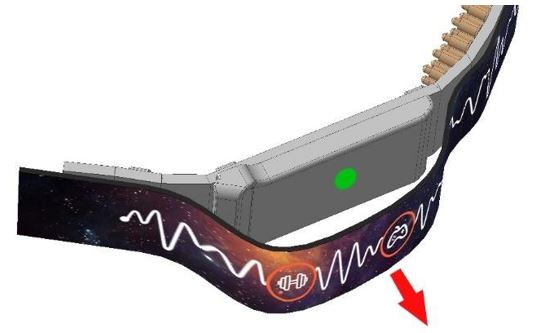
![]() Important! Proper installation of the battery should result in illumination of the LED, located in the electrical block (LED will be lit for 2 seconds).
The device’s readiness for use is indicated by the periodic illumination of the LED in the electrical block, which blinks once every 2 seconds.
Important! Proper installation of the battery should result in illumination of the LED, located in the electrical block (LED will be lit for 2 seconds).
The device’s readiness for use is indicated by the periodic illumination of the LED in the electrical block, which blinks once every 2 seconds.
CHARGING THE BATTERY
In order to charge the battery:
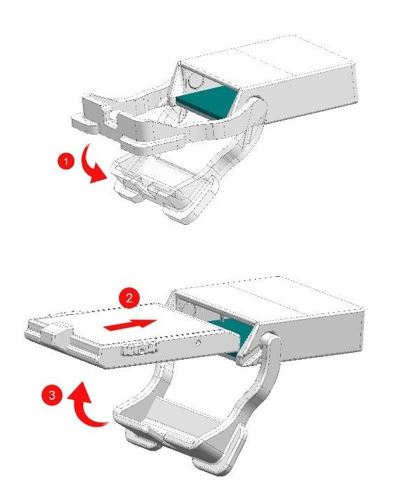
1. Insert the battery into the charger. To accomplish this, lower the rotating handle out of the way, insert the battery into the slot in a horizontal position, making sure that the battery projection interlocks with the cut-out section of the rotation handle;
![]() The battery projection should interlock precisely with the cut-out section in the charger’s rotating handle.
The battery projection should interlock precisely with the cut-out section in the charger’s rotating handle.
2. Plug the USB cable with microUSB head into any power source compatible with USB (See also: Power Source Technical Characteristics);
![]() Fully recharging the battery should take no longer than 4 hours.
Fully recharging the battery should take no longer than 4 hours.
Operating Modes of the Charger
LED not lit: charger has ceased operation; battery is charged;
LED glows red: charger is turned on;
LED flashes red: battery is charging.
PREPARING BRAINBIT FOR USE
Step-by-step instruction for using Brainbit:
1. Unpack Brainbit;
2. Insert battery into Brainbit headband;
3. Confirm that Brainbit is functioning (The LED in the electrical block blinks periodically);
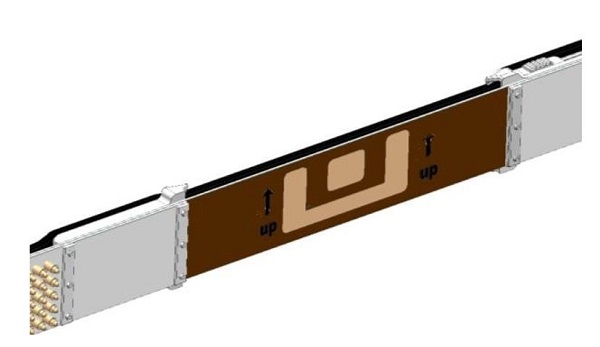
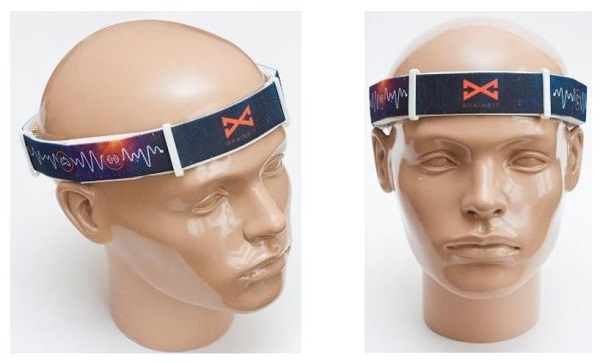
4. Having extended the textile band near the clasp, place Brainbit on the head while remaining attentive to the following:
4.1. Proper placement of reference and indicator electrodes on the forehead;
4.2. The direction of the arrows near the indicator electrode;
4.3. Ensure that the electrodes near the nape of the neck and behind the ears have sufficient contact with the skin;
4.4. Apply foam pads (x4) to the electrodes if necessary.
Brainbit is now ready for use.
CARING FOR THE DEVICE
![]() All parts of the device may be carefully wiped clean with a moist toilette.
All parts of the device may be carefully wiped clean with a moist toilette.
![]() The textile band should be periodically washed with soap and warm water.
The textile band should be periodically washed with soap and warm water.
![]() Do not expose the internal components of the device to moisture!
Do not expose the internal components of the device to moisture!
TECHNICAL CHARACTERISTICS
| Operating System | Platform Requirements |
|---|---|
| Android version 4.3 | BLE version 4.0 or newer |
| iOS version 9 | BLE version 4.0 or newer |
| MacOS | BLE version 4.0 or newer |
| Windows – desktop | BLE version 4.0 or newer |
| Linux | BLE version 4.0 or newer |
MANUFACTURER’S WARRANTY
Warrantied period of operation - 12 months. Warrantied period of storage - 6 months from date of production.
In the event that repair or correction of defects is necessary during the warrantied period, the warranty is extended by the amount of time for which the device is not available for use due to the defect or malfunction. If the device is replaced in its entirety, the warranty period is renewed from the date of the replacement.
Warranty repair of the device is carried out at the cost of the seller/manufacturer. After expiration of the warranty, the cost of repairs is borne by the purchaser of the device.
If a warrantied device ceases to function due to improper operation, then the cost of repairs is borne by the purchaser.
TROUBLESHOOTING
Before contacting technical support, attempt the following troubleshooting procedures:
DEVICE DOES NOT CONNECT TO MOBILE PHONE OR COMPUTER
1. The battery may be fully drained. Remove battery from device and charge it in accordance with ‘Charging the Battery’ (page 14). Then install the battery and confirm that the device enters Standby Mode (indicated by the LED blinking once every 2 seconds).
2. The battery may be missing. Install the battery.
ELECTRICAL BLOCK LED DOES NOT ILLUMINATE
1. Confirm that the battery is installed in its housing.
2. Check that the battery has been inserted properly.
